


Common Anode RGB LED vs Common Cathode RGB LED: 5050 SMD Pinout and Buying Guide
25 June, 2026
If you’re responsible for purchasing LED lighting systems, here’s something you need to know right away: heat is killing your LEDs faster than anything else. Research shows that 68% of premature LED failures happen because of heat-related problems. When LEDs overheat, they fail years before their expected lifespan, and that means wasted money on replacements, emergency maintenance calls, and unexpected downtime.
The good news is that managing heat in LED systems doesn’t have to be complicated. Once you understand the basics and know what to look for, you can make smarter purchasing decisions that protect your investment and deliver the performance you’re paying for.

Heat is a major factor in LED failure. High-power LEDs convert electrical energy into light, but some of that energy turns into heat, which builds up in small spaces. Poor heat control can cause brightness loss, color shifts, and early failures.
Overheating doesn’t always result in instant failure. Look out for these gradual signs:
In severe cases, thermal runaway occurs, where heat causes more damage and leads to complete failure.
Inadequate thermal management leads to:
With proper thermal management, LEDs can last 50,000 hours. Without it, they may fail after just 15,000-20,000 hours—leading to frequent replacements and increased costs.

Several key components work together to keep LEDs cool. Understanding these helps you evaluate products and ask the right questions when making purchasing decisions.
Standard circuit boards trap heat, which can shorten your LED’s lifespan. MCPCBs are designed to pull heat away from LED chips and spread it across a larger surface. They transfer heat much faster than standard boards, improving LED performance and longevity.
Material Options:
For most business applications, aluminum MCPCBs are the most practical choice.
LEDs and their mounting surfaces aren’t perfectly smooth, creating tiny gaps that block heat flow. Thermal interface materials fill these gaps, improving heat transfer between the LED and its surface.
Common Types:
Advanced Options:
Graphene and phase-change materials offer improved performance but tend to be more expensive. Always ask for thermal resistance specifications to ensure you’re selecting the right product for your application.
Heat sinks pull heat away from LEDs and release it into the surrounding air. The material and size of the heat sink are crucial to its performance.
Material Options:
Cooling Design:
More surface area means better heat dissipation. Heat sinks use fins or increased surface area to maximize cooling. Some advanced designs incorporate heat pipes for more even heat distribution.
Passive vs Active Cooling:
While standard cooling methods are sufficient for most LEDs, certain high-power applications may require more sophisticated solutions.
These advanced technologies are best for installations where LED failure could cause significant disruptions, such as in critical or high-power environments.

❏ Thermal Resistance Rating: Request thermal resistance (°C/W). Lower values (e.g., 5°C/W) are better for heat management.
❏ Maximum Operating Temperature: Ask if the LED can operate safely below 85°C to prevent overheating and degradation.
❏ Power Handling Capability: Inquire about how many watts the LED can safely dissipate without overheating.
❏ Brightness Maintenance Rating (L70/L80): Ensure the LED maintains at least 70% (L70) or 80% (L80) of its initial brightness over its lifespan.
❏ Request Test Data: Ask for real-world thermal testing, performance results, and accelerated life testing data.
❏ Check Certifications: Verify certifications like ISO9001, LM-80, and UL for quality, long-term testing, and safety compliance.
❏ Review Warranty Terms: Ensure the warranty covers thermal-related failures and inquire about exclusions.
❏ Ask for References: Request examples of installations similar to your application to gauge the supplier’s experience.
❏ Indoor vs. Outdoor Use: Make sure the LED is suitable for the intended environment, particularly for outdoor installations.
❏ Facility Temperature: Confirm the LED is designed for your facility’s temperature range (e.g., uncooled warehouses).
❏ Operating Hours: Ask if the LED is suitable for 24/7 operation, as it requires better thermal management.
❏ Power Levels & Space Constraints: Verify if the LED can handle high-power levels and if the space allows for necessary cooling solutions.
❏ Long-Term Operating Costs: Ask about energy efficiency and maintenance costs over the LED’s lifespan.
❏ Replacement Frequency: Inquire how often the LED may need replacement and the associated costs (labor, downtime).
❏ Installation & Maintenance Costs: Check if higher upfront costs (e.g., better cooling solutions) save on long-term expenses.
❏ Missing Thermal Specifications: Avoid products without clear thermal resistance or maximum temperature information.
❏ Lack of Certifications: Skip suppliers who cannot provide valid quality or safety certifications (e.g., UL, ISO).
❏ Unusually Low Prices: Be cautious of overly cheap options—quality thermal management components are expensive.
❏ No Technical Support: Ensure the supplier offers technical assistance and application guidance to resolve any issues.

Even premium thermal management fails without proper installation. Here’s what actually matters.
Where your LED meets its mounting surface is the most important junction in your entire heat path. Getting this right has the biggest impact on temperature control.
Wipe down all contact areas with isopropyl alcohol and lint-free cloths. Any oil, dust, or oxidation will block heat transfer.
Not tight enough leaves air gaps that trap heat. Too tight can crack circuit boards or push out your thermal material. If the manufacturer provides torque specs, use them.
Static electricity can invisibly damage LEDs even when they still light up afterward. Use a grounded workstation and wear an anti-static wrist strap—failures from static damage often show up months later.
Keep temperatures down wherever possible:
Avoid sources of extra heat:
Add temperature sensors to important installations. Real temperature data helps you spot trouble before LEDs fail completely.
Check your LEDs regularly and watch for:
Keep records of how things change. Write down the brightness and color when you first install LEDs. Take measurements periodically so you can see degradation patterns and replace units before they fail.
Save documentation for warranty claims. Take photos, record temperatures, and log all maintenance work. You’ll need this evidence if you have to make a warranty claim.
❌ Using heat sinks that are too small — This causes more premature failures than anything else
❌ Skipping thermal interface materials — Those tiny microscopic gaps make a huge difference in heat transfer
❌ Regulating voltage instead of current — This can trigger thermal runaway; always use constant-current drivers
❌ Forgetting that heat adds up — Ten LEDs close together produce ten times the heat and need much stronger cooling
❌ Putting off repairs — Thermal contact problems only get worse over time
❌ Blocking air vents — Keep all airflow paths completely open and unobstructed
❌ Running LEDs above rated power — The extra brightness you gain isn’t worth the years of lifespan you lose
❌ Assuming everything is fine — Always verify with actual measurements before finishing the job
Test temperatures, check thermal contact quality, and confirm your cooling works before you call the installation complete.
Reading about thermal management won’t save your LEDs—taking action will. Here’s your step-by-step plan.
Walk through your facility and look at your existing LED installations. Ask yourself these questions:
Temperature check:
Performance degradation:
Visual inconsistencies:
Failure patterns:
Physical damage:
If you answered yes to any of these, you have thermal management problems that will cause early failures. Make a list of problem areas and tackle the most critical ones first—start with high-traffic areas, safety-critical lighting, or installations that are expensive to access.
When you contact LED suppliers, request complete thermal specifications right away. Let them know you understand thermal management and expect detailed data. Good suppliers will respect your knowledge. Suppliers who dodge these questions or can’t provide answers aren’t worth your time.
Specifically request:
| Specification | What to Look For | Why It Matters |
|---|---|---|
| Thermal Resistance (Rth) | < 10°C/W for standard use < 5°C/W for high-power |
Lower values mean better heat transfer and cooler operation |
| Junction Temperature (Tj) | ≤ 85°C standard ≤ 75°C premium |
Higher temperatures accelerate LED degradation |
| LM-80 Test Reports | Minimum 6,000 hours of data | Industry standard for predicting long-term performance |
| Thermal Derating Curves | Complete performance vs. temperature charts | Shows how output changes with heat |
| MCPCB Specifications | Aluminum 1.5-3mm thick Thermal conductivity 1-3 W/mK |
Determines how quickly heat moves away from LED |
Figure out what LED failures actually cost your business:
| LED Type | Typical Price Range |
|---|---|
| Industrial high-bay LEDs | $150 – $400 per fixture |
| Commercial panel lights | $50 – $150 per unit |
| Specialty or custom fixtures | $500 – $2,000+ |
| Cost Category | Typical Range | Notes |
|---|---|---|
| Electrician labor | $75 – $150/hour | Usually 1-2 hours per fixture including travel |
| Lift/scaffolding rental | $200 – $500/day | For high installations |
| Electronic waste disposal | $5 – $25 per fixture | Varies by location and regulations |
| Production downtime | $1,000 – $10,000/hour | Depends on industry and facility |
| Productivity loss from poor lighting | 10 – 25% decrease | Studies show measurable impact on work quality |
| Item | Calculation | Cost |
|---|---|---|
| Failed fixtures (25 units at 25% failure rate) | 25 × $300 | $7,500 |
| Replacement labor | 25 × 1.5 hours × $100/hour | $3,750 |
| Lift rental | 3 days × $300/day | $900 |
| Total unplanned costs | $12,150 |
Spending an extra $30-50 per fixture upfront for better thermal management saves you $12,150 in this scenario alone.
Don’t hope vendors will get it right—require it. Here’s what to specify:
| Parameter | Minimum Standard | High-Performance Standard |
|---|---|---|
| Maximum thermal resistance | ≤ 8°C/W | ≤ 5°C/W |
| Maximum junction temperature | ≤ 85°C | ≤ 75°C |
| Heat sink material | Aluminum 6063-T5 | Copper or specialized alloys |
| MCPCB construction | 1.5mm aluminum core ≤ 0.2mm dielectric layer |
2-3mm core High conductivity dielectric |
| Certification | What It Verifies | Required For |
|---|---|---|
| ISO 9001 | Quality management systems | All suppliers |
| LM-80 | Long-term lumen maintenance (6,000+ hours) | All LED products |
| TM-21 | Lumen maintenance projection methodology | Performance predictions |
| UL/cUL or CE | Safety compliance | Your region’s requirements |
| IP Rating | IP65+ outdoor IP40+ indoor |
Environmental protection |
Rate suppliers on thermal management capabilities, quality of technical support, relevant project experience, and certification status. Use the same criteria every time so you can compare fairly.
| Evaluation Category | Points Available | Scoring Criteria |
|---|---|---|
| Thermal Specifications Provided | 25 points |
|
| Relevant Certifications | 20 points |
|
| Technical Support Quality | 20 points |
|
| Project Experience | 20 points |
|
| Warranty Terms | 15 points |
|
| TOTAL | 100 points |
| Installation Type | Minimum Score | Rationale |
|---|---|---|
| Critical installations | 70/100 | High reliability required; failures cause major disruptions |
| General use | 60/100 | Standard reliability acceptable; lower consequence of failure |
Any supplier scoring below 50 points should be eliminated from consideration, regardless of price. The risk isn’t worth the savings.
Building internal expertise is one of the smartest investments you can make. When your team understands thermal management, they catch problems early, install systems correctly the first time, and save you thousands in preventable failures. Let’s start with the fundamentals everyone should know.
You don’t need to turn your maintenance crew into thermal engineers. But they do need to understand three critical areas: why heat management matters, how to spot trouble before it becomes expensive, and which practices prevent most failures. Here’s what makes the difference.
The temperature your LEDs run at makes a huge difference in how long they last. LEDs running at 95°C fail 50% faster than those running at 75°C—that’s half the lifespan you’re paying for. Here’s an even more powerful fact: for every 10°C you reduce the operating temperature, your LED lifespan roughly doubles. Think about that—50,000 hours becomes 100,000 hours just by keeping things cooler.
And here’s the kicker: missing thermal paste during installation can increase junction temperature by 15-25°C, which means you’re throwing away years of LED life because of one simple mistake.
| Task | Standard | Why It Matters |
|---|---|---|
| Surface preparation | Clean with 99% isopropyl alcohol | Contaminants increase thermal resistance by 20-40% |
| Thermal paste amount | Pea-sized (0.1-0.2g), spread to 0.1mm | Too little = air gaps; too much = insulation |
| Mounting torque | M3: 0.5-1.2 N⋅m M5: 2-4 N⋅m |
Follow manufacturer specs to avoid damage |
| Thermal pad quality | ≥ 3 W/mK conductivity | Standard pads (1-2 W/mK) often inadequate |
These basics take an hour to teach but prevent years of expensive problems. Make thermal management training part of your standard onboarding, and refresh it annually. Your team will catch issues that would otherwise cost you thousands.
Verbal instructions get forgotten, misremembered, or lost when someone leaves your team. Written procedures ensure everyone does the job the same way—the right way—every single time. Create simple, clear guides for the most critical tasks.
Here’s the step-by-step process your team should follow every time:
Step 1: Start with clean surfaces. Use a lint-free cloth and isopropyl alcohol to clean both the LED base and the mounting surface. This isn’t optional—any contamination blocks heat transfer.
Step 2: Let everything dry completely. Wait 2-3 minutes for the alcohol to fully evaporate. Rushing this step leaves moisture that interferes with thermal contact.
Step 3: Apply your thermal interface material. If you’re using thermal paste, apply a pea-sized amount (about 0.1-0.2 grams) to the center of the LED base. If you’re using thermal pads, remove the protective film, center the pad on the LED base, and press firmly for 10 seconds to ensure good contact.
Step 4: Mount immediately. Once you’ve applied thermal paste, you have about 5 minutes to complete the mounting before contamination becomes an issue. Don’t leave it sitting around.
Step 5: Never reposition after mounting. If you need to adjust the position, don’t just twist it around. Remove the LED completely, clean both surfaces again, apply fresh thermal material, and start over. Reusing disturbed thermal paste creates air gaps that ruin heat transfer.
| Screw Size | Torque Range | Installation Pattern |
|---|---|---|
| M3 | 0.8-1.0 N⋅m | Tighten in star/cross pattern |
| M4 | 1.5-2.0 N⋅m | Ensure even pressure distribution |
| M5 | 2.5-3.5 N⋅m | Check for rocking or gaps |
Verification: Use feeler gauge if available—gap should be < 0.05mm
Once everything’s installed, you need to verify it’s actually working. Here’s how:
Written procedures eliminate the “I thought that’s how you do it” conversations after something goes wrong. Laminate these guides, post them in your work areas, and include them in your installation kits. When everyone follows the same process, quality becomes consistent and problems become rare.
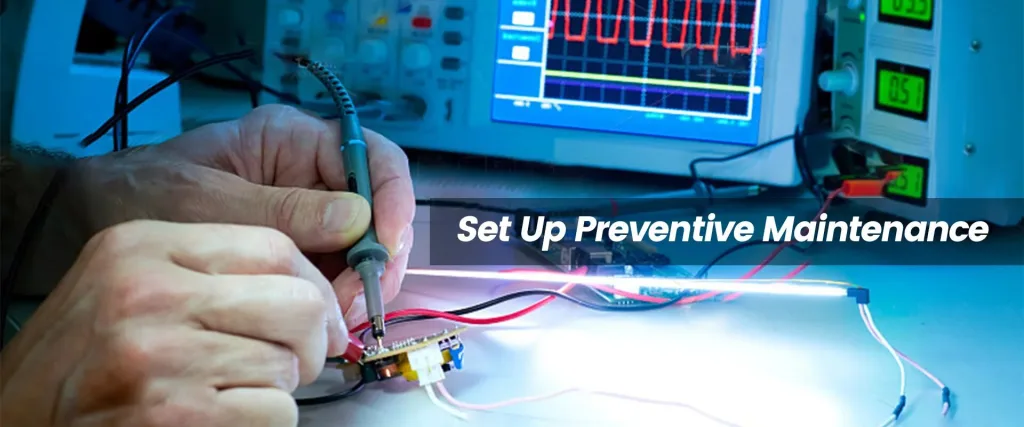
Here’s the reality: catching a problem early costs maybe $50 in labor and some compressed air. Missing that same problem until the LED fails costs $300-$500 in parts, labor, and downtime. Preventive maintenance isn’t an expense—it’s insurance that pays for itself every single time. Inspect critical installations quarterly, general ones semi-annually.
During inspections, check for dust buildup on heat sink fins, look for brown or yellow discoloration indicating overheating, verify mounting screws remain tight, and use your IR thermometer to spot-check temperatures. Keep a log to track trends over time.
Your cleaning schedule depends on your environment: heavy industrial facilities need monthly cleaning with compressed air (40-60 PSI, held 15cm away), light industrial spaces need quarterly cleaning, and clean offices just need annual cleaning with a microfiber cloth.
Beyond cleaning, measure illuminance levels every 6 months with a light meter—more than 15% decline signals problems. Add these quick checks to your existing maintenance rounds. Ten minutes of inspection prevents hours of emergency repairs later.
Nothing’s more frustrating than finding a problem you know how to fix but not having the $15 part you need. Meanwhile, that LED keeps overheating and dying. Smart facilities keep essential supplies on hand so repairs happen in minutes, not days.
You don’t need a huge inventory, just the basics that handle 90% of thermal issues:
Most purchasing decisions focus on the next 90 days: lowest price, fastest delivery, what fits this quarter’s budget. But LED systems last 10-20 years when properly managed. The decisions you make today will either save you money for the next decade or cost you a fortune in endless repairs.
The difference between good and poor thermal management isn’t just a few percentage points—it’s the difference between LEDs that deliver their full rated lifespan and ones that fail at one-third of their expected life.
| Thermal Management Quality | Expected Lifespan | Years of Use* | Replacement Frequency |
|---|---|---|---|
| Well-managed LEDs | 50,000-100,000 hours | 11-22 years | 66-75% fewer replacements |
| Poorly managed LEDs | 15,000-25,000 hours | 3-6 years | Replace 3-4× more often |
*Based on 12 hours/day operation
Good thermal management gives you 3-4 times longer life, which means dramatically fewer replacements over your facility’s lifetime.
With good thermal management, failures follow a predictable pattern—LEDs fail when they reach their rated hours, so replacement cycles become scheduled maintenance you can plan and budget for. With poor thermal management, everything becomes chaotic: failures happen randomly, your budget gets eaten by surprise expenses, and emergency calls become frequent and costly. The #1 cause of failure switches from normal end-of-life wear to preventable thermal breakdown.
| Cost Benefit | Impact on 1,000-Fixture Facility |
|---|---|
| Reduced maintenance calls | 60-70% fewer service visits |
| Energy efficiency maintained | LEDs stay efficient vs. degrading performance |
| Lower disposal costs | Fewer replacements = less e-waste |
| Total annual savings | $15,000-$25,000 per year |
The cost of lighting failures varies dramatically by industry. Manufacturing facilities lose $5,000-$50,000 per hour in production stoppages. Healthcare facilities face safety and compliance issues when critical lighting fails in operating rooms or patient care areas.
Every dollar you invest in quality thermal management returns three to four dollars over the system’s lifetime. The facilities spending less upfront end up spending far more over ten years—it’s not even close.
The LED thermal management market is projected to reach $4.7 billion by 2033 because businesses everywhere have learned the hard way—thermal failures cost more than quality systems would have. Don’t learn this lesson the expensive way.
At HQG LED, we’ve spent years helping engineers and procurement teams navigate thermal management decisions that actually work. We’re not just shipping LEDs—we’re helping you avoid the $46,500 mistakes that come from cutting corners on thermal design.
Here’s how we make your next LED project easier:
✅ Complete thermal specifications upfront – We provide actual Rth values, junction temperature ratings, and LM-80 test data, not vague marketing claims
✅ MCPCB and heat sink recommendations – Tell us your power levels and ambient conditions, and we’ll recommend thermal solutions that actually keep your LEDs cool
✅ Free thermal design consultation – Send us your installation specs, and we’ll help you calculate heat loads and verify your cooling approach before you commit
✅ Application-specific guidance – Whether it’s high-bay warehouse lighting or outdoor installations, we’ve solved similar thermal challenges and can share what actually works
✅ Consistent quality and certifications – ISO 9001, LM-80, UL certified products with warranties that cover thermal-related failures
Don’t let poor thermal management waste your LED investment. Contact HQG today, and let’s make sure your lighting lasts the full 10-20 years it should!
📧 Email: marketing005@hqgled.com
💬 WhatsApp: +86 135-1027-0516