


Common Anode RGB LED vs Common Cathode RGB LED: 5050 SMD Pinout and Buying Guide
25 June, 2026
SMD LEDs have basically taken over the lighting industry, and for good reason. These surface mount LEDs pack serious performance into a tiny footprint, which is why you’ll find them in everything from LED strip lights to car headlights. The tricky part is knowing which SMD LED type fits your specific application—and whether you actually need a 2835 or a 5730. This guide covers the types you’ll encounter most, their typical applications, and the selection criteria that actually matter for your project.

An SMD LED (Surface Mount Device Light Emitting Diode) is a type of LED chip that mounts directly onto the surface of a circuit board without wire leads. Unlike traditional through-hole LEDs that have two long metal pins, SMD LEDs have small metal contact pads on the bottom that attach flat against the board using automated soldering processes.
The key advantage is size and efficiency: SMD LEDs are compact (typically 1.4mm to 5.7mm), produce high light output relative to their footprint, and dissipate heat directly into the circuit board for better thermal management. This design makes them ideal for modern lighting applications where space, brightness, and manufacturing speed matter.
Most LED strips, panel lights, and commercial fixtures today use SMD LEDs because they’re faster to assemble, more reliable, and deliver better performance per dollar than older LED technologies.
Surface mount device LEDs work completely differently from the LEDs most people grew up with.
Older through-hole LEDs have two metal wires sticking out that go through holes in a circuit board. SMD LEDs don’t have any wires. Instead, the LED chip sits on a tiny flat package with metal pads on the bottom that attach directly to the board’s surface.
The flat design means machines can handle installation. Pick-and-place equipment grabs each SMD LED, puts it in position, and moves to the next one—hundreds per minute. Through-hole LEDs usually need manual insertion or slower specialized equipment.
SMD LEDs take up roughly 70% less space on a circuit board, which matters for any compact device. They also handle heat better because they sit flat against the board. Heat transfers directly into the board material instead of through wire leads. Better cooling means longer life—typically 50,000 hours or more.
Manufacturing costs drop for another reason too. Fewer parts to assemble and fewer solder joints means less that can go wrong. The flat solder connections handle vibration and temperature changes better than wire leads do.
Quality varies a lot in the SMD LED market. Some manufacturers cut corners on materials or processes, and their LEDs might only produce 60-70% of the claimed brightness. Others sell counterfeit products labeled as premium brands.
SMD LEDs come in several standard sizes, each designed for different applications. The four-digit number in each name tells you the physical dimensions in millimeters—a 3528 LED measures 3.5mm by 2.8mm. Knowing these common types helps you pick the right one for your project.
| SMD Package | Dimensions (mm) | Typical Output (lm / chip)* | Typical Power (W / chip)* | Core Features | Common Uses |
|---|---|---|---|---|---|
| 3528 | 3.5 × 2.8 | 4–5 lm | ~0.06 W | Small, low-cost, single-die | Accent lighting, small signs, indicators |
| 5050 | 5.0 × 5.0 | 15–18 lm (single-color) | ~0.24 W (single-color) | Triple-chip package; RGB-capable | Color-changing strips, architectural accents, decorative lighting |
| 2835 | 2.8 × 3.5 | 20–24 lm | ~0.20–0.50 W | High efficacy, improved thermal path | Office panels, retail lighting, pro fixtures |
| 3014 | 3.0 × 1.4 | 8–11 lm | ~0.10–0.12 W | Slim/narrow profile for dense arrays | Ultra-thin strips, cabinet lights, channel letters |
| 5730 / 5630 | 5.7 × 3.0 / 5.6 × 3.0 | 40–50 lm | ~0.5 W | High output, lighting-class | Warehouse, street, parking, industrial fixtures |
The 3528 is one of the smallest SMD LEDs you’ll commonly find. At 3.5mm by 2.8mm, it’s about the size of a match head. Each chip puts out 4-5 lumens while drawing just 0.06 watts of power.
You’ll see these in accent lighting, small signs, and indicator lights where you need gentle illumination without much power consumption. They’re popular because they’re inexpensive and work well when you don’t need high brightness. If you’re lighting a display case or adding subtle backlighting to a sign, 3528s do the job at the lowest cost.
The 5050 measures 5.0mm by 5.0mm and actually contains three separate LED chips in one package. This design gives it 15-18 lumens of output—roughly three times brighter than a 3528. Power consumption is 0.24 watts per unit.
The three-chip design has a bonus feature: it enables RGB color mixing. Each of the three chips can be a different color (red, green, blue), and by controlling them independently, you can create any color. This is why 5050s dominate the color-changing LED strip market.
Use 5050s for decorative lighting, architectural accents, and anywhere you want more brightness or color options. They hit a sweet spot between output and efficiency that works for a wide range of applications.
Don’t let the similar dimensions fool you—the 2835 (2.8mm by 3.5mm) performs very differently from the 3528. Better chip design and thermal management let it produce 20-24 lumens while drawing 0.2-0.5 watts depending on the specific model.
This is the LED you’ll find in most modern commercial lighting. Office ceiling panels, retail store lighting, and professional fixtures often use 2835s because they deliver excellent brightness-to-size ratio. High-CRI versions are available when accurate color rendering matters, like in clothing stores or art galleries.
If you need efficient, quality lighting and space isn’t extremely tight, 2835s are usually the best choice.
The 3014 measures 3.0mm by 1.4mm, making it the narrowest option in common use. Output is 8-11 lumens per chip. The thin profile is the main selling point here.
These work in ultra-thin LED strips and fixtures where height restrictions rule out other options. You’ll find them in cabinet lighting, channel letters for signs, and anywhere the installation space is limited. The tradeoff is that you’ll need more of them to achieve the same total brightness as larger LEDs.
When you need serious brightness, the 5730 (also called 5630) delivers. At 5.7mm by 3.0mm, it’s larger than the others and produces 40-50 lumens per chip while drawing 0.5 watts. This is roughly ten times the output of a 3528.
These LEDs are for demanding applications: warehouse high-bay lighting, street lights, parking lot fixtures, and industrial facilities. The high output creates more heat, so you’ll need proper cooling—usually aluminum-backed circuit boards and heat sinks. But when you need maximum brightness, 5730s are the standard choice.
Beyond the physical sizes, SMD LEDs come in different color configurations:
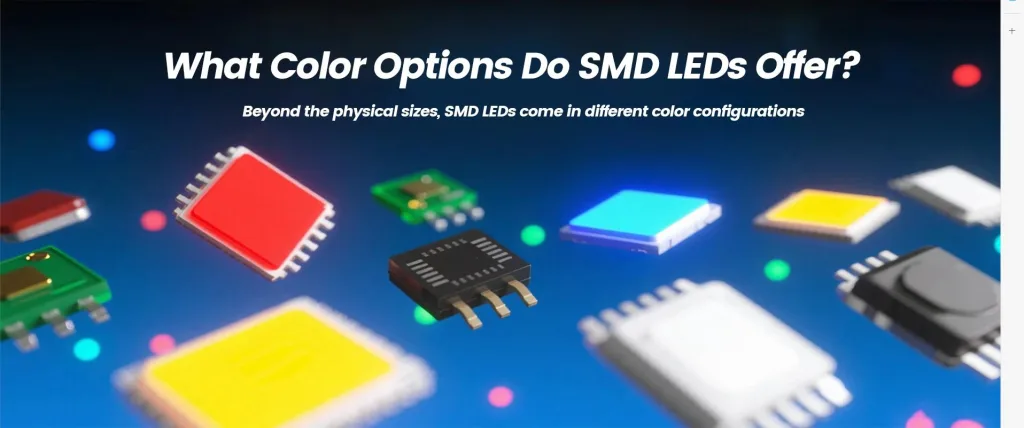
Beyond standard lighting, several specialty SMD LEDs serve specific purposes:
SMD LEDs show up across everyday products and heavy-duty systems because they’re bright, efficient, and easy to assemble at scale. Below are the most common SMD LED applications—from commercial LED lighting in offices to industrial LED solutions on factory floors:
Flexible LED strips, ceiling panels, recessed cans, and street/parking fixtures rely on SMD packages for high output and long life. Automakers also use them for headlights, taillights, and interior accent lighting thanks to compact size, durability, and precise beam control.
Large video walls, illuminated storefront signs, and backlit billboards use dense SMD arrays for uniform brightness and vivid color. Retail displays and point-of-sale lightboxes favor SMD LEDs for slim profiles, low heat, and consistent color across wide viewing angles.
Phone, tablet, TV, and monitor backlights depend on SMD LEDs for thin designs and even illumination. Laptops use them for keyboard lighting, while wearables like smartwatches and fitness trackers benefit from low power draw and small footprints.
Machine-vision inspection lights demand high intensity and tight control; medical exam lights need high CRI for accurate color. Indoor farms use plant-tuned spectra, and factories deploy UV SMD LEDs for fast curing of inks, coatings, and adhesives.
Smart-home lighting systems mix tunable white and RGB for scene control. Li-Fi prototypes test data over light using SMD arrays. Advanced driver-assist and self-driving sensors integrate infrared SMD LEDs for depth sensing, eye-safe illumination, and robust night performance.
Selecting the right SMD LED isn’t just about specs—it’s about matching your application requirements to the right component, validating performance, and scaling to production confidently.

Before looking at LED datasheets, define what your product or installation actually needs.
Is this accent lighting, task lighting, outdoor signage, automotive interior, or something else? Each has different brightness, color, and durability requirements.
Choose color characteristics that fit the use case and keep batches visually consistent across sites and builds.
| Parameter | Recommended Range | Typical Use |
|---|---|---|
| CCT | 2700–3000K | Hospitality, residential-style areas |
| CCT | 4000–5000K | Offices, classrooms, retail floors |
| CCT | 5000–6500K | Inspection, warehouses, precision tasks |
| CRI | ≥80 | General commercial lighting |
| CRI | ≥90 | Retail displays, medical, photography, color-critical work |
| Binning Consistency | ≤3-step SDCM (MacAdam ellipse) | Multi-fixture installs; consistent appearance across production lots |
Put CCT, CRI, and binning in the spec sheet by part number; it reduces returns and brand image issues from color mismatch.
Document these requirements in a simple spec sheet—it becomes your baseline for comparing LED options and for communicating with suppliers.
Now match your requirements to actual SMD LED packages and specifications.
Electrical compatibility drives reliability, safety, and dimming behavior.
Clear electrical requirements reduce flicker complaints, premature failures, and field rework.
Confirm temperature, cooling, and protection levels before you commit volume.
| Factor | Typical Spec / Option | Guidance |
|---|---|---|
| Temp Range (LED) | −40°C to +85°C | Verify fixture/driver ratings; derate output at high temps |
| Thermal Management | Al-core PCB / thermal vias / HS | Required for higher-power packages and dense arrays |
| Ingress Protection | IP20 | Dry indoor areas |
| Ingress Protection | IP65 | Outdoor/splash; sealed or gasketed housings |
| Ingress Protection | IP67–IP68 | Wet zones or temporary submersion |
Correct IP and thermal design lowers field failure rates and maintenance cost over the product life.
Tie lifetime claims to real operating conditions so service plans and TCO are accurate.
Reliability data aligned to your conditions reduces unexpected service calls and contract disputes.
Compliance and documentation keep deployments scalable and audit-ready.
Clear compliance and documentation save weeks in approvals and prevent shipment holds.
Never skip the sample phase. What looks good on paper may not perform in your actual application.
This validation phase typically takes 2–4 weeks but prevents costly problems in production.
Before ordering large quantities, run a small production batch to verify that your manufacturing process works correctly. This stage reveals problems that don’t show up during sample testing and allows your team to refine the assembly process before committing to high volumes.
Start with a manageable batch that’s large enough to identify manufacturing issues but small enough to limit financial risk. Use the specifications below to ensure your pilot order matches your validated samples exactly:
| Specification | Requirement | Why It Matters |
|---|---|---|
| Quantity | 500–2,000 LEDs or 50–200 assemblies | Large enough to reveal process issues; small enough to limit financial risk |
| Part Numbers | Exact match to validated samples | Prevents performance variations from substitute parts |
| Bin Codes | Same CCT and brightness bins | Ensures pilot batch looks and performs identically to samples |
| Lead Time | Confirmed delivery date | Keeps production schedule on track |
| Packaging | Moisture barrier bags, tape & reel | Protects LEDs during shipping and storage; matches production handling |
Confirm all these details in writing with your supplier before placing the order. Unclear specifications at this stage cause delays and rework later.
Once the LEDs arrive, build pilot units the same way you plan to build volume. This shows whether your line, tools, and team are truly ready.
This phase typically takes 2–5 days depending on your production complexity. The documentation you create here prevents weeks of troubleshooting during volume production.
Check quality at three stages to catch problems before they multiply:
| Inspection Stage | What to Check | Acceptance Criteria |
|---|---|---|
| Incoming Inspection | Physical appearance, part markings, packaging condition, moisture exposure | LEDs match sample appearance; packaging undamaged; labels match order specifications |
| In-Process Checks | Solder joint quality (under 10× magnification), LED polarity, placement accuracy, heat damage | All solder joints look correct; LEDs face the right direction; centered on pads; no discoloration |
| Final Testing | Light output (lumens), color temperature (CCT), CRI, forward voltage, current draw | Performance within ±5% of sample data; electrical values match datasheet ±10% |
Compare your pilot batch performance against the original samples you validated in Step 3. Any difference larger than ±5% indicates a problem—either the LED batch is different from samples, or your assembly process needs adjustment.
Take the pilot batch out of the factory and use it the same way your customers will. This is where hidden issues show up.
After successful pilot production, you’re ready for volume orders. Effective supply chain management at this stage keeps quality consistent, costs controlled, and production running smoothly.
Secure clear terms with your supplier before placing large orders:
| Agreement Item | What to Define | Typical Range/Example |
|---|---|---|
| Volume Pricing | Annual quantity tiers with price breaks | 10K units @ $0.50, 50K @ $0.42, 100K @ $0.38 |
| MOQ & Schedule | Minimum order size and delivery frequency | MOQ 5,000 units; monthly or quarterly delivery |
| Part Lock-In | Fixed bin codes and part numbers | 2835 bin code W3, no substitutions without approval |
| Stocking Options | Consignment, scheduled releases, or VMI | For volumes >100K annually |
Get these terms in writing to prevent substitutions or price changes mid-production.
Put systems in place to track inventory and supplier performance:
Quality checks continue with every shipment:
Prepare for product changes and supplier transitions:
| Lifecycle Activity | Action | Timeline |
|---|---|---|
| EOL Notifications | Monitor supplier roadmaps; calculate last-time-buy quantities | 6–12 months advance notice typical |
| Replacement Qualification | Test new LED samples, run pilot builds, update documentation | Budget 2–3 months |
| Documentation Updates | Keep current datasheets, certifications, LM-80 reports | Review annually |
| Requalification Budget | Reserve funds for supplier or LED type changes | $5K–$15K per change |
Active supply chain management prevents disruptions and keeps production costs stable. Strong supplier relationships, backup options, and change planning ensure manufacturing success as your product and market evolve.
Choose SMD LEDs by matching brightness, color quality, electrical specs, and environment to your real use case. Confirm lifetime data (LM-80/TM-21) and certifications before you buy. Run a quick pilot build to validate dimming, thermal performance, and color consistency. When you’re ready, ask us for samples and a tailored cross-reference so you can lock pricing and supply with confidence.